
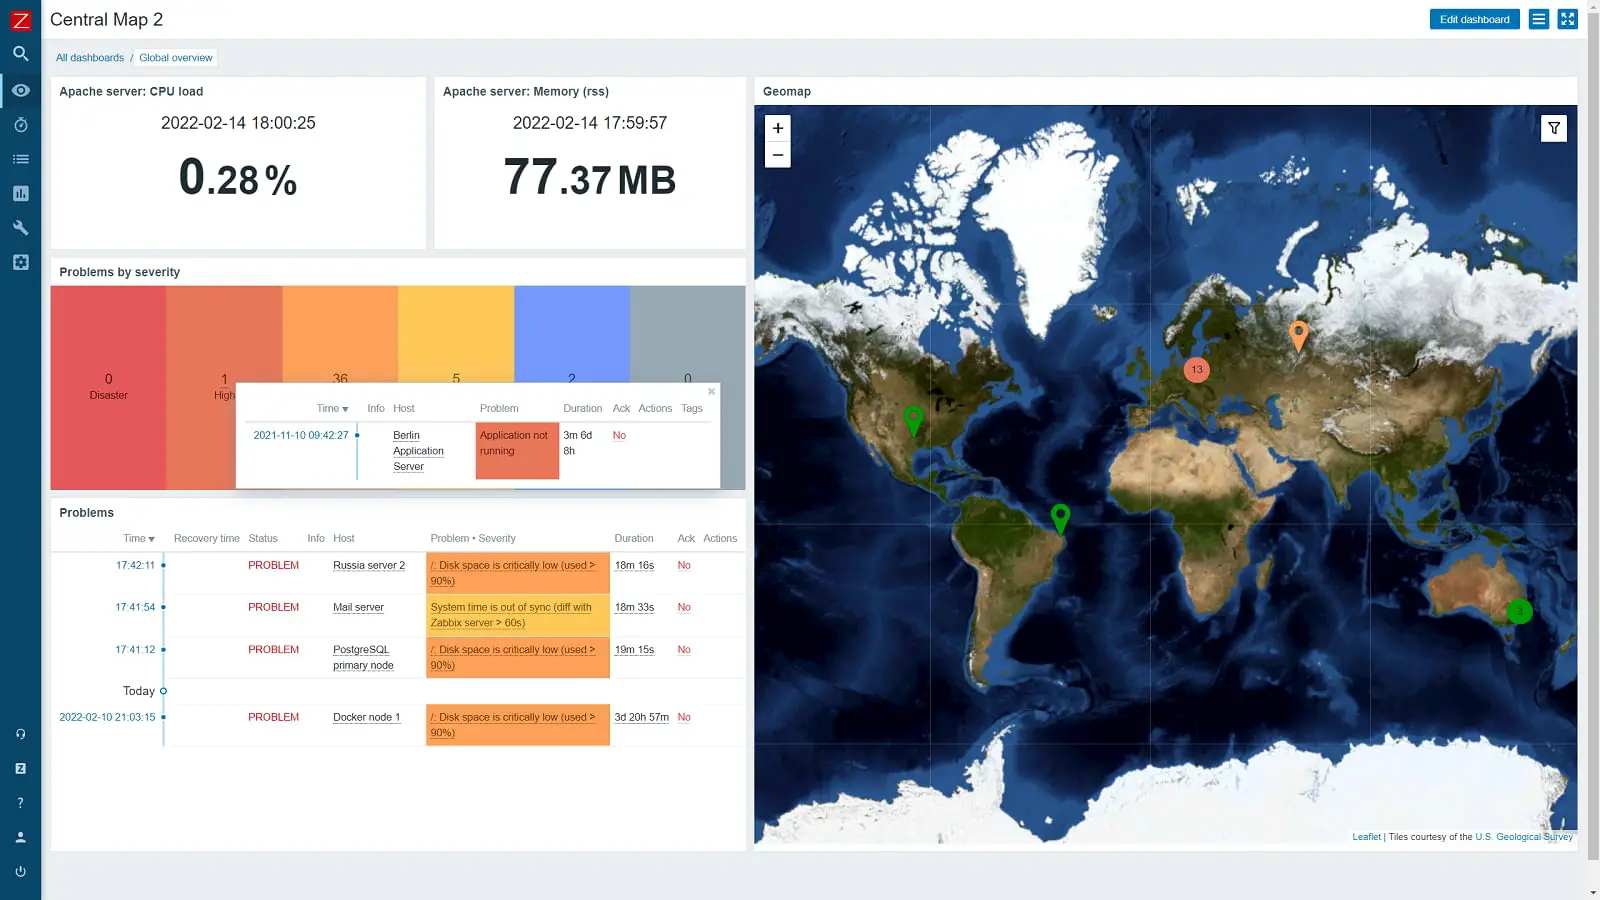
Believe it or not, Zabbix 7 on Raspberry Pi can monitor up to 400 devices gathering 125 metrics every 5 minutes from each device (around 100 values per second)! I have tested this on Raspberry Pi 4 B+ and later on the Raspberry Pi 4 version.
You can use any SD card with 16G if you are planning to monitor a small number of devices like home network or small office. However, if you are planning to monitor hundreds of devices then a fast SD card is necessary like SanDisk Extreme 64GB (160 MB/s read and 90 MB/s write speed) or better.
Never heard of Zabbix before? Zabbix is 100% free open-source ultimate enterprise-level software designed for monitoring availability and performance of IT infrastructure components. You can read a case-study about Zabbix popularity and find out more about open-source movement in this article.
Zabbix server is installable on any Linux distribution, but in this tutorial, I will show you how to install the latest version Zabbix 7.0 LTS release on Raspberry Pi OS and how to make key optimizations so that your RPI performs better and lasts longer.

Enough of talk lets do some work! First, we will install and configure Zabbix server, then a database and lastly the frontend – check the picture above for a better understanding of Zabbix architecture.
This guide is for installing Zabbix monitoring system (Server) on Raspberry Pi, while guide for installing Zabbix proxy on Raspberry Pi can be found on this link.
Table of Contents
- Step 1: Install Raspberry Pi OS (Raspbian) on Raspberry Pi
- Step 2: Connect to Raspberry via SSH
- Step 3: Install Zabbix server, frontend, and agent
- Step 4: Configure database on Rasberry Pi
- Step 5: Start Zabbix server and agent processes
- Step 6: Configure Zabbix frontend
- Step 5: Login to frontend using Zabbix default login credentials
- Step 8: Optimizing Raspberry Pi (optional)
- Step 9: Optimizing Zabbix Server (optional)
- Step 10: Optimizing MySQL database (optional)
- Step 11: Partition MySQL tables
- Step 12: How to manage Zabbix / MySQL / Apache server
- Step 13: Upgrade between minor versions
Step 1: Install Raspberry Pi OS (Raspbian) on Raspberry Pi
Note: You need to log in as a root user on your Linux server with “su -” to successfully execute commands used in this tutorial.
If you don’t have already Rasbian installed (check with command “cat /etc/os-release“) you can download Raspberry Pi OS (Raspbian) image from the official site (choose lite version) and write it on SD card following this guide.
Basically, all you need do is download the Raspberry Pi OS (Raspbian) Lite image and write it to an SD card with the Etcher tool.

Step 2: Connect to Raspberry via SSH
a. Enable SSH on device
Login to Raspberry (default username and password: pi / raspberry) and enable SSH service:
systemctl enable ssh
systemctl start ssh
b. Find out RPi IP addres
pi@raspberrypi:~$ ip a | egrep "inet "
inet 127.0.0.1/8 scope host lo
inet 10.7.44.235/24 brd 10.7.44.255 scope global eth0
c. Connect to Rasberry Pi
From Linux terminal you can connect like this:
root@myrasbian:~$ ssh pi@10.7.44.235
The authenticity of host '10.7.44.235 (10.7.44.235)' can't be established.
ECDSA key fingerprint is SHA256:ih9lUhmihqZMoK9ElwPLiL0eumVw/PCjBjIN8E6Fl3Y.
Are you sure you want to continue connecting (yes/no)? yes
Warning: Permanently added '10.7.44.235' (ECDSA) to the list of known hosts.
pi@10.7.44.235's password:
Linux raspberrypi 4.14.71-v7+ #1145 SMP Fri Sep 21 15:38:35 BST 2018 armv7l
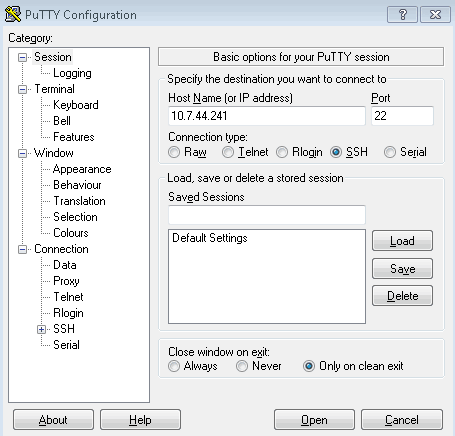
Or use Putty if you are connecting from Windows:
Step 3: Install Zabbix server, frontend, and agent
Install Zabbix .deb package on your Raspberry Pi OS (Raspbian):
Zabbix 7.0 LTS version (supported until 2029)
wget https://repo.zabbix.com/zabbix/7.0/raspbian/pool/main/z/zabbix-release/zabbix-release_7.0-2+debian$(cut -d"." -f1 /etc/debian_version)_all.deb
dpkg -i zabbix-release_7.0-2+debian$(cut -d"." -f1 /etc/debian_version)_all.deb
apt update
apt -y install zabbix-server-mysql zabbix-frontend-php zabbix-apache-conf zabbix-sql-scripts zabbix-agent
You can find more information about Zabbix’s life cycle and release policies on the official website.
Step 4: Configure database on Rasberry Pi
In this installation, I will use password rootDBpass as root database password and zabbixDBpass as Zabbix database password. Consider changing your password for security reasons.
a. Install MariaDB
Install MariaDB database:
apt -y install mariadb-server
Once the installation is complete, start the MariaDB service and enable it to start on boot using the following commands:
systemctl start mariadb
systemctl enable mariadb
b. Reset root password for database
mysql_secure_installation
Enter current password for root (enter for none): Press Enter
Switch to unix_socket authentication [Y/n] y
Change the root password? [Y/n] y
New password: <Enter root DB password>
Re-enter new password: <Repeat root DB password>
Remove anonymous users? [Y/n]: Y
Disallow root login remotely? [Y/n]: Y
Remove test database and access to it? [Y/n]:  Y
Reload privilege tables now? [Y/n]:  Y
c. Create database
mysql -uroot -p'rootDBpass' -e "create database zabbix character set utf8mb4 collate utf8mb4_bin;"
mysql -uroot -p'rootDBpass' -e "create user 'zabbix'@'localhost' identified by 'zabbixDBpass';"
mysql -uroot -p'rootDBpass' -e "grant all privileges on zabbix.* to zabbix@localhost identified by 'zabbixDBpass';"
d. Import initial schema and data
Import shema and data (could last up to 20 min):
zcat /usr/share/zabbix-sql-scripts/mysql/server.sql.gz | mysql --default-character-set=utf8mb4 -uzabbix -p'zabbixDBpass' zabbix
e. Enter database password in Zabbix configuration file
Open zabbix_server.conf file with command:
nano /etc/zabbix/zabbix_server.conf
and add database password in this format anywhere in file:
DBPassword=zabbixDBpass
Save and exit file (ctrl+x, followed by y and enter).
Step 5: Start Zabbix server and agent processes
systemctl restart zabbix-server zabbix-agent
systemctl enable zabbix-server zabbix-agent
Step 6: Configure Zabbix frontend
a. Restart Apache web server and make it start at system boot
systemctl restart apache2
systemctl enable apache2
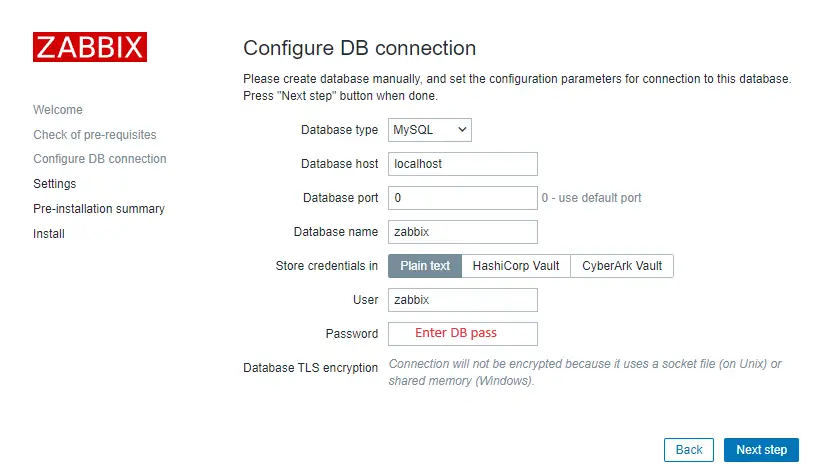
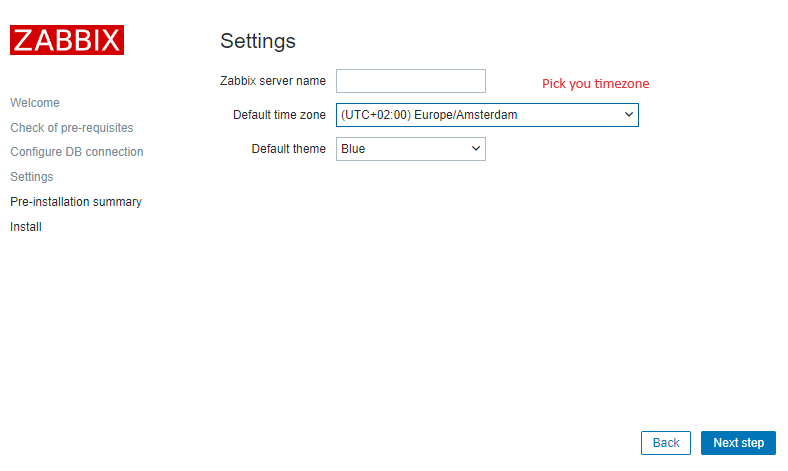
b. Configure web frontend
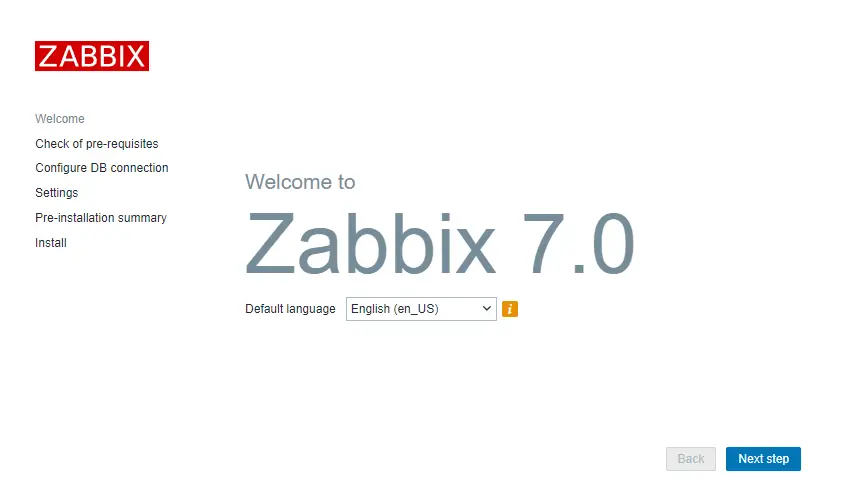
Connect to your newly installed Zabbix frontend using URL “http://server_ip_or_dns_name/zabbix” to initiate the Zabbix installation wizard.
In my case, that URL would be “http://192.168.1.161/zabbix” because I have installed Zabbix on the server with IP address 192.168.1.161 (you can find the IP address of your server by typing “ip a” command in the terminal).
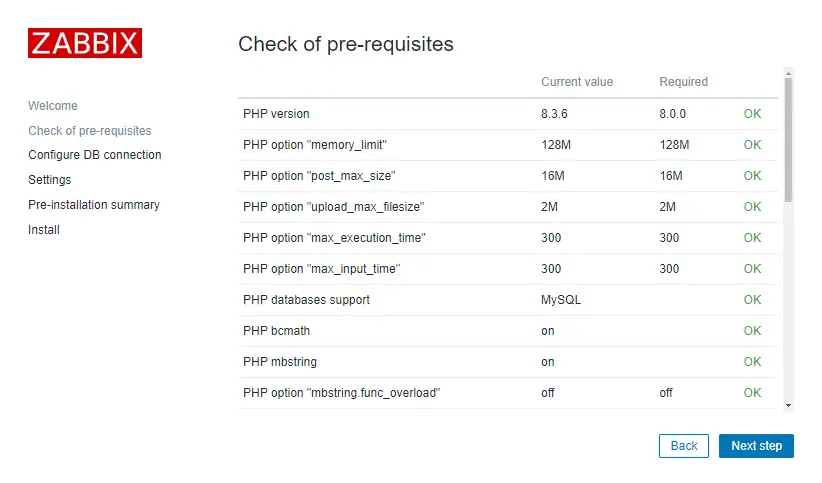
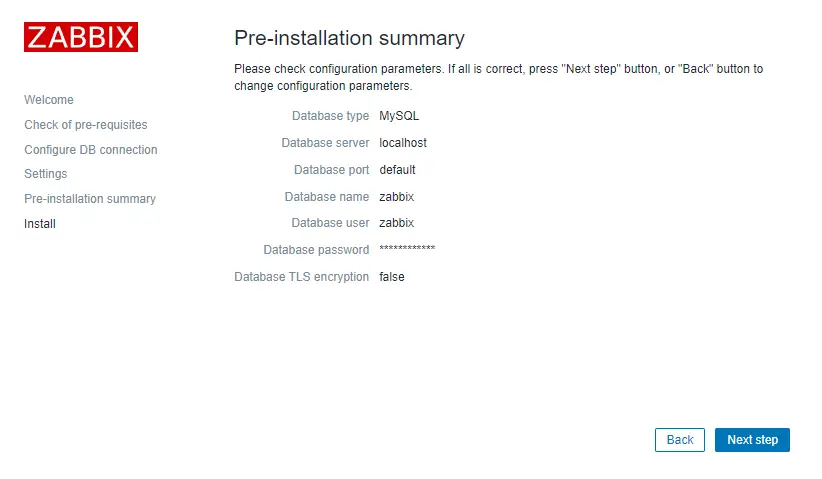
Basically, in this wizard you only need to enter a password for Zabbix DB user and just click “Next step” for everything else. In this guide, I have used a zabbixDBpass as a database password, but if you set something else, be sure to enter the correct password when prompted by the wizard.
If you get the error “zabbix Locale for language “en_US” is not found on the web server. Tried to set: en_US, en_US.utf8, en_US.UTF-8, en_US.iso885915, en_US.ISO8859-1” then use this command to fix it:
apt-get install -y locales && echo 'en_US.UTF-8 UTF-8' >> /etc/locale.gen && locale-gen && service apache2 restart
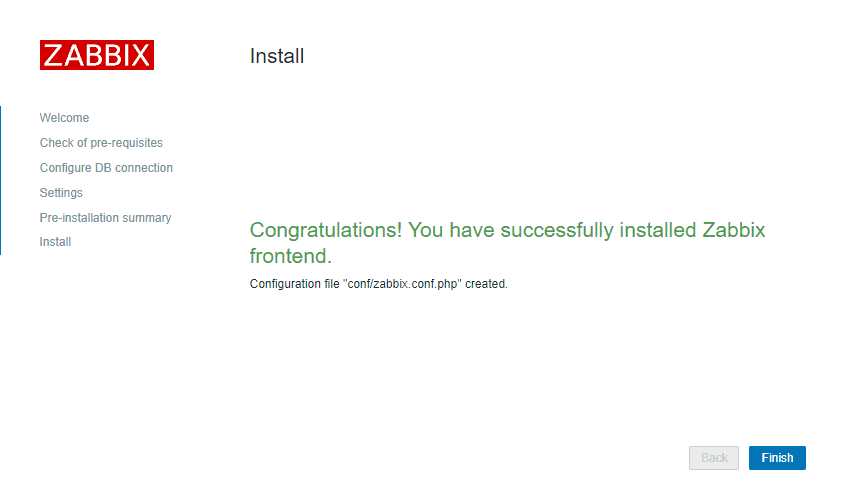
That’s it, you have installed Zabbix monitoring system!
Step 5: Login to frontend using Zabbix default login credentials
Use Zabbix default admin username “Admin” and password “zabbix” (without quotes) to login to Zabbix frontend at URL “http://server_ip_or_dns_name/zabbix” via your browser.
In my example, I have installed Zabbix on server 192.168.1.161 so I will enter in my browsers URL field http://192.168.1.161/zabbix (you can find the IP address of your server by typing “ip a” command in the terminal)
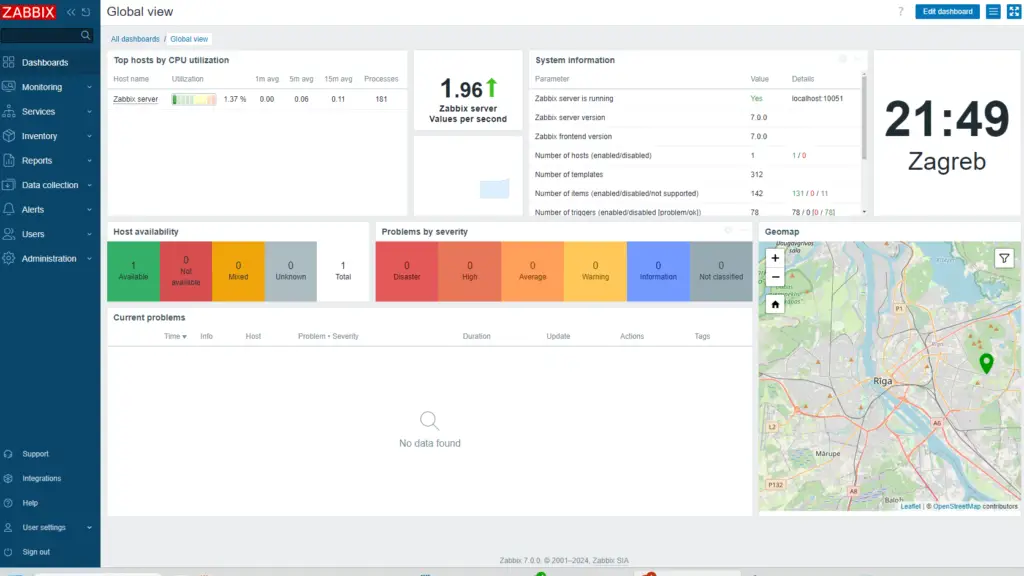
CONGRATULATIONS!
You have successfully installed Zabbix 7 Server on Raspberry Pi and now you can monitor anything!
No need to change anything else as other steps are optional.
CONTINUE TO LEARN MORE:
Optimizing Raspberry Pi OS, Zabbix Server and MySQL database.
Step 8: Optimizing Raspberry Pi (optional)
When you are using Zabbix on Raspberry Pi you have two problems: the lifespan of the SD card because of limited number of read/writes and SD card performance.
Zabbix needs every IOPS that he can get for the best user experience.
You can make some tweaks on the OS level that will mitigate the mention problems.
a. Reduce the frequency of swap usage
Open sysctl.conf file with: “nano /etc/sysctl.conf” and add this line to the file:
vm.swappiness = 1
Save and exit file (ctrl+x, followed by y and enter)
b. Disable access time property for directories
If you don’t care about files or directories access time property you can completly disabled it by the noatime and nodiratime mount options in “/etc/fstab” file.
Open fstab file with “nano /etc/fstab" and change only “defaults” and “defaults,noatime” (do not change anything else!) to this:
PARTUUID=6c586e13-01   /boot  vfat  defaults,noatime,nodiratime,fmask=0122  0   2
PARTUUID=6c586e13-02   /      ext4  defaults,noatime,nodiratime             0   1
Save and exit file (ctrl+x, followed by y and enter)
c. Turn off system log
Open journald.conf file with “nano /etc/systemd/journald.conf“, uncomment the line that starts with “Storage=auto” by removing symbol # and change to “Storage=none“.
Save and exit file (ctrl+x, followed by y and enter).
d. Increase swap size
Before, we have set “swappines=1” so that swap memory is avoided at all costs. However, sometimes Zabbix will need more memory (DB backup, housekeeping and similar). Because of that, we will increase the default swap file from 100M to 1000M.
Open dphys-swapfile file with “nano /etc/dphys-swapfile” and change “CONF_SWAPSIZE=100” to:
CONF_SWAPSIZE=1000
Save and exit file (ctrl+x, followed by y and enter).
e. Reboot
Use “reboot” command to reboot Raspberry Pi.
Step 9: Optimizing Zabbix Server (optional)
Don’t bother with this optimization if you are monitoring a small number of devices, but if you are planning to monitor a large number of devices then continue with this step.
Open zabbix_server.conf file with command: "nano /etc/zabbix/zabbix_server.conf” and add this configuration anywhere in file:
StartPollers=100
StartPollersUnreachable=50
StartPingers=50
StartTrappers=10
StartDiscoverers=10
StartHTTPPollers=10
CacheSize=128M
HistoryCacheSize=64M
HistoryIndexCacheSize=32M
TrendCacheSize=32M
ValueCacheSize=256M
Save and exit file (ctrl+x, followed by y and enter).
This is not a perfect configuration, keep in mind that you can optimize it even more. Let’s say if you don’t use ICMP checks then set the “StartPingers” parameter to 1 or if you don’t use active agents and active proxies then set “StartTrappers” to 1 and so on. You can find out more about the parameters supported in a Zabbix server configuration file in the official documentation.
Step 10: Optimizing MySQL database (optional)
a. Create custom MySQL configuration file
Create file “10_my_tweaks.cnf” with “nano /etc/mysql/mariadb.conf.d/10_my_tweaks.cnf” and paste this configuration:
[mysqld]
max_connections = 454
innodb_buffer_pool_size = 400M

innodb-log-file-size = 128M
innodb-log-buffer-size = 128M
innodb-file-per-table = 1
innodb_buffer_pool_instances = 8
innodb_old_blocks_time = 1000
innodb_stats_on_metadata = off
innodb-flush-method = O_DIRECT
innodb-log-files-in-group = 2
innodb-flush-log-at-trx-commit = 2

tmp-table-size = 96M
max-heap-table-size = 96M
open_files_limit = 65535
max_connect_errors = 1000000
connect_timeout = 60
wait_timeout = 28800
Save and exit the file (ctrl+x, followed by y and enter) and set the correct file permission:
chown mysql:mysql /etc/mysql/mariadb.conf.d/10_my_tweaks.cnf
chmod 644 /etc/mysql/mariadb.conf.d/10_my_tweaks.cnf
Configuration parameter innodb_buffer_pool_size determines how much memory can MySQL get for caching InnoDB tables and index data. You should set that parameter to 70% of system memory if only database is installed on server.
However, in this case, we are sharing a server with Zabbix and Apache processes so you should set innodb_buffer_pool_size to 40% of total system memory – that would be 400M because Raspberry Pi 3 B+ has 1G RAM (set 800M if you have Raspberry Pi 4 that has 2G RAM).
I didn’t have any problems with memory, but if your Zabbix server crashes because of lack of memory, reduce “innodb_buffer_pool_size” and restart MySQL server.
Note that if you follow this configuration, you may receive “Too many processes on the Zabbix server” alarm in Zabbix frontend due to the new Zabbix configuration. It is safe to increase the trigger threshold or turn off that alarm (select “Problems” tab → left click on the alarm → select “Configuration” → remove the check from “Enabled” → hit the “Update” button)
Learn more about database optimization in the tutorial: How to optimize Zabbix database?
b. Restart Zabbix and MySQL service
Stop and start the services in the same order as below:
systemctl stop zabbix-server
systemctl stop mysql
systemctl start mysql
systemctl start zabbix-server
Step 11: Partition MySQL tables
This step is probably the most important for Raspberry Pi’s performance.
Partition MySQL tables in 5 minutes following this simple guide, but don’t use the default setting. Keep history data for 1 day and trend data for 60 days if you have small SD card (smaller than 64GB).
Step 12: How to manage Zabbix / MySQL / Apache server
Sometimes you will need to check or restart Zabbix, MySQL or Apache service – use commands below to do that.
Zabbix Server
systemctl zabbix-server

MySQL Server
systemctl mysql

Apache Server
systemctl apache2

Zabbix Agent
systemctl zabbix-agent
Step 13: Upgrade between minor versions
I wrote about these upgrade procedures in my post about Zabbix upgrade. Zabbix’s team releases new minor versions at least once a month. The main purpose of minor upgrades is to fix bugs (hotfix) and sometimes even bring new functionality. Therefore, try to do a minor upgrade of Zabbix at least once a month.
There is no need for backups when doing a minor upgrade, they are completely safe. With this command you can easily upgrade mintor versions of 6.0.x (for example, from 6.0.1 to 6.0.5):
apt install --only-upgrade 'zabbix*'
And restart Zabbix server afterward:
systemctl restart zabbix-server
Hello,
in the Step 4 => d. chapter, where you write de db, you miss an ‘ after the zabbix db password
zcat /usr/share/zabbix-sql-scripts/mysql/server.sql.gz | mysql –default-character-set=utf8mb4 -uzabbix -p’zabbixDBpass>'< zabbix
thanks for the usefull guide!
Thanks for the info. I have corrected the error. Regards.
Hi,
When opening the web interface after config (first login) I got a lot of messages that en_EN.utf8 was not known.
I applied the solution suggested in the following post: https://www.taste-of-it.de/zabbix-server-locale-for-language-not-found-on-the-web-server/
It comes to executing the command as root (either sudo or via sudo su – ) : dpkg-reconfigure locales, then selecting the desired locale and generating it (via ok) and selecting the locale.
Then a restart of the services is needed : systemctl restart zabbix-server.service zabbix-agent apache2.service
Hi,
Thanks for this guide !!!
Still had the problem with the default-character-set : in copy paste remains a single lookalike-dash … ;(
Maybe mention it in the text before the script line as a remark.
Greetings
Step 4C doesn’t work, goes to a prompt <-, and that's all she wrote. This command:
mysql -uroot -p'rootDBpass' -e "create database zabbix character set utf8mb4 collate utf8mb4_bin;"
Whole thing derails right there. NOT a mariadb expert, just following the instructions as given.
I dropped one line about creating a user in copy-pasting. I have corrected it now. Thanks for the info.
Thanks, much appreciated!
The following command didn’t work for me:
zcat /usr/share/zabbix-sql-scripts/mysql/server.sql.gz | mysql –default-character-set=utf8mb4 -uzabbix -p’zabbixDBpass’ zabbix
It did without brackets enclosing zabbixDBpass;
zcat /usr/share/zabbix-sql-scripts/mysql/server.sql.gz | mysql –default-character-set=utf8mb4 -uzabbix -pzabbixDBpass zabbix
Thx for the info. I have updated the guide.
I think it got updated with a minor typo. It’s –default-character-set not -default-character-set.
The following command didn’t work for me:
zcat /usr/share/zabbix-sql-scripts/mysql/server.sql.gz | mysql –default-character-set=utf8mb4 -uzabbix -pzabbixDBpass zabbix
The option command ‘-default-character-set’ is wrong, for me the right one is ‘–default-character-set’.
NOTE: The web browse cannot display double dash before ‘default-character-set”
Thx for the info. Corrected.
What’s the best way to take a backup or clone the Zabbix instance/database? The couple of times I’ve tried it seems to either have not worked, or corrupted the DB in the sense that there’s GUID missmatches so I end up having to rebuilt the configuration from scratch. Thoughts? Ideas? Links to direct me to research figure out on my own?
Did you try mysqldump?
https://bestmonitoringtools.com/upgrade-zabbix-to-the-latest-version/#d_Backup_Zabbix_database
I followed this guide and all seems to have gone fine but when getting to loading into the web gui for the first time there is no gui, only what looks like php code. I’ve tried googling but can’t find a solution that works for me. Anyone have any ideas? I have already checked that all the php dependencies are installed.
Are you on the latest Raspberry Pi OS? What error do you get on the frontend? Try to reinstall only the frontend again (zabbix-frontend-php zabbix-apache-conf) and repeat configuration from Step 6.
Regards
On Step C – logging in via putty, it should be noted that default PI login creds aren’t sufficient when following step-by-step and the mysql commands will fail due to lack of privs. “sudo su” to switch to root/SU access will allow you to proceed through the mysql commands successfully.
Thx for the advice. I have removed all the “sudo” from the commands and added a notice at the beginning of the tutorial about login as root.
A great guide, thank you.
But I get the following error message for step 4b:
ERROR 2002 (HY000): Can’t connect to local MySQL server through socket ‘/var/run/mysqld/mysqld.sock’ (2)
What can I do here?
Thanks for your help and best regards
Hi, try to enable and start mariadb:
sudo systemctl start mariadb
sudo systemctl enable mariadb
Have you tried adding a USB HDD to the PI, so you can keep data there instead of on the SD card? I am thinking I would want to try that.
No, but that is not a bad idea. With USB HDD you don’t need to worry about the short life span of the storage like you do with the SD card.
Thanks so much for this tutorial, truly excellent. Your hard work is certainly appreciated, especially keeping everything up to date. Everything has worked out perfectly using your instructions.
Thank you for this guide, and for your help.
All running well on my Pi 4 8GB.
Thank you for this great guide! It worked out perfectly for my needs in a small lab.
For some reason it seemed like it isn’t install the DB? I ended up running this sudo apt install mariadb-server and it installed and I was able to continue on with the install.
Thx for the information, I updated the tutorial. The new Raspberry OS doesn’t seem to have MariaDB installed, so you need to install it.
I noticed that on the fstab edit you have noatime listed twice on / is that correct?
noatime,noatime,nodiratime
Thx for the info Chuck.
One “noatime” slipped while copy-pasting, I corrected that.
Thanks for this tip and tutorial, I was able to setup everything, and now have a purpose for the many lazy Raspberry Pi I have laying around.
Hi I did not have a good experience with raspberry on zabbix,
I tried raspberry pi 0 and raspberry pi 3b and in all off them I got gaps in my graphics ( no data ) Plus, zabbix is really heavy for raspberry pi… moving thought the menus take a lot of seconds sometimes..
Hello Douglas,
Zabbix can’t work well on Rpi Zero or on an older Rpi (not enough CPU and RAM). You need to use Rpi 3 B+ or a newer model and a fast SD card (160 MB/s read and 90 MB/s write speed).
After successfully completing your instructions all works fine but I see errors twice
Disk read/Write Request responses are too high
Any idea how to address these errors
Hello Steven,
did you set up database partitioning? What SD card are you using?
This is missing in the instructions
sudo apt -y install zabbix-frontend-php zabbix-apache-conf
Thx for the info Glen, somehow “zabbix-apache-conf” slipped when I was updating tutorial, I have added it back.
This is such a nice post – thank you!
But step 11 is pretty important (as mentioned) and before I started, I would have grabbed a Samsung 256GB SD card (instead of going through the hours of setup (because it’s slow to import the SQL), etc. I would have LOVED that recommendation at the begging to (you might want to keep track of lots of data for 365 days (versus 1 day of storage as recommended for anything less than 32GB).
Is there a way to update the blog post for a “NOTE:” – because otherwise, this is awesome… and I’m about to redo the entire process but with a nice and large SD card.
Thanks again – (and you have a done a wonderful job step by step with explanations – I love it).
Hi,
Glad to help, I have increased the recommendation of SD card to min 64GB at the beginning of the post. Thx for the suggestion.
Regards
I tested this manual on the Raspberry pi 2. It´ s ok, but this procces: zcat /usr/share/doc/zabbix-server-mysql*/create.sql.gz | mysql -uzabbix -p’zabbixDBpass’ zabbix, was very long. Maybe 3 hours.
Ivan,
thanks for the info. Nice to know that Zabbix can work even on Raspberry Pi 2!
Regards
Hello Aldin,
Really appreciate the support you are providing to this great post!
I have another question for you regarding Zabbix on Raspberry Pi. I’ve heard of another way to run Zabbix when you have a small server closet or location with a small number of devices, running a Zabbix proxy to push alerts to your main Zabbix server is ideal.
Your instructions in your post focus on Zabbix Server…but if I also wanted to use my Pi 4 as a Zabbix proxy, what would need to change from your instructions to allow me to install Zabbix proxy? I can see a benefit to using a Pi as both a Zabbix Server and a Zabbix Proxy (depending on the location).
Thanks again for any helpful advice you can provide.
You heard correctly. Zabbix proxy more suitable for Raspberry Pi than a server so I wrote a tutorial how to install and configure Rpi on Zabbix proxy:
https://bestmonitoringtools.com/install-zabbix-proxy-on-raspberry-pi/
Regards
You say:Note that if you follow this configuration, you will receive “Too many processes on the Zabbix server” alarm in Zabbix frontend due to the new Zabbix configuration. It is safe to turn off that alarm or increase the trigger threshold.
So how can i get rid off the Alarm. I don’t understand the default processes of the template linux server!
I only have the zabbix server running on raspberry pi 3b with 1G ram and i get “Too many processes on the Zabbix server” so why is the value so low in the template.
Can you please tell the steps how we can turn off the alarm or what value will be safe if number of host that will be monitored with the raspberry is lower than 10?
I have added instruction for disabling that alarm, check the section where alarm “Too many processes on the Zabbix server” is mentioned.
Thank you Aldin for your reply. I’ve increased my innodb_buffer_pool_size to 2GB since I have a 4GB Pi.
Is there a command I can use to check the wear leveling of my Pi SD card as time goes on? I’ve followed all the steps you’ve specified to help with the optimizing Zabbix on my Pi. Will there be a time when I need to copy my SD card to a new SD card as this one will eventually wear out?
Thank you.
Yes, there will be a time when you will need to replace the SD card, but I m not sure when. Some SD cards are way more durable (like SanDisk or Samsung) and some have a very short life span. Make sure that you backup the Zabbix database on another location (USB stick or Dropbox) or do an SD card clone every month or two.
Regards
Thank you Aldin. Good to know. I will put in place a process whereby I backup my card on a semi-regular basis.
Cheers!
Thank you for these instructions!
What would you recommend for Ram when running Zabbix on a Pi 4? Is a 4GB Pi going to work better than 2GB?
Thank you.
Hi GREAVETTE,
yes, RPi will work better with more memory but only if you increase innodb_buffer_pool_size in MySQL configuration file. In that case, MySQL will cache more stuff into RAM and everything will run faster.
Regards